Aloha and happy Tuesday friends! I'm over at the a2z Scrapbooking blog making the most out of the beautiful and versatile Hero Arts Reef Border Die.
Here's a little sneaky peek...
I hope you'll hop on by to check it out and say hi!
Mahalo for stopping by!!
Showing posts with label Shaker Card. Show all posts
Tuesday, August 8, 2017
Monday, April 11, 2016
Meet Biscuit!
Hi friends and Happy Monday! It's been whirlwind of events in my household celebrating 3 generations of birthdays within a week, having family in town and the addition of this new little fella...
Meet Biscuit! He's a 2 month old Pomchi (Pomeranian/Chihuahua) from a coworker's litter. All of his siblings (all girls) were sold and my coworker kept asking if anyone wanted him. It just so happened my 10 year old has been asking for a puppy since her 5th birthday, but I just didn't feel it was the right time and totally unsure about taking care of a pet! We fostered him for a weekend to see how he would do with the kiddos and everyone fell in love!!
So with a new puppy means I had to make a puppy card!
That's my card for today! I really liked adding the die cut balloons with the shaker balloons for dimension and fun. Definitely a perk to have coordinating die cuts with your stamps!!
Mahalo for stopping by!!
Meet Biscuit! He's a 2 month old Pomchi (Pomeranian/Chihuahua) from a coworker's litter. All of his siblings (all girls) were sold and my coworker kept asking if anyone wanted him. It just so happened my 10 year old has been asking for a puppy since her 5th birthday, but I just didn't feel it was the right time and totally unsure about taking care of a pet! We fostered him for a weekend to see how he would do with the kiddos and everyone fell in love!!
So with a new puppy means I had to make a puppy card!
I combined Hero Arts Balloon Animal Birthday and die with Hero Arts Playful Animal. I created the panel by diecutting a stitched rectangle. I used distress inks to create a subtle blue background. I then die cut the balloons using the coordinating dies. I stamped up some solid balloons using Hero Arts ombre inks and die cut them as well to create more dimension to the shaker card. I used the WRMK fuse tool to make the shaker (filled with Martha Stewart mini sterling stars) to keep the card from being too bulky.
I used Hero Arts Intense Black ink for the dog and sentiment and colored with copics. I love that Hero Arts now has a copic friendly ink!!
Mahalo for stopping by!!
Saturday, December 12, 2015
Have a Mocha-chino and Cocoa-licious Holiday!
Oh yeah! It's that time of year again for the
Love this time of year with the cooler weather, festivities and sippin' cocoa!
Today's card wishes you all a very mocha-chino and cocoa-licious holiday!
I took some Doodlebug Design North Pole pattern paper and die cut a rectangle to create a window for a shaker. On my card front I stamped out that sweet Darcie's Heart and Home sentiment
and masked off a part of the penguin to make him look like he's popping out of the sentiment.
Of course he needed a little hot cocoa in his hands so I stamped out the to go cup. Everything was colored in with colored pencils and I reluctantly used those fun shaker bits gifted by my sweet friend
A closeup...
I hope to be back with more so stay tuned for a giveaway!
Mahalo for stopping by!!
Wednesday, September 23, 2015
A Butterfly Shaker Card for A2Z Scrapbooking and WINNER!
Hey there! I'm over at
and would love for you to stop on by!
There's a bunch of things on sale over at A2Z Scrapbooking including
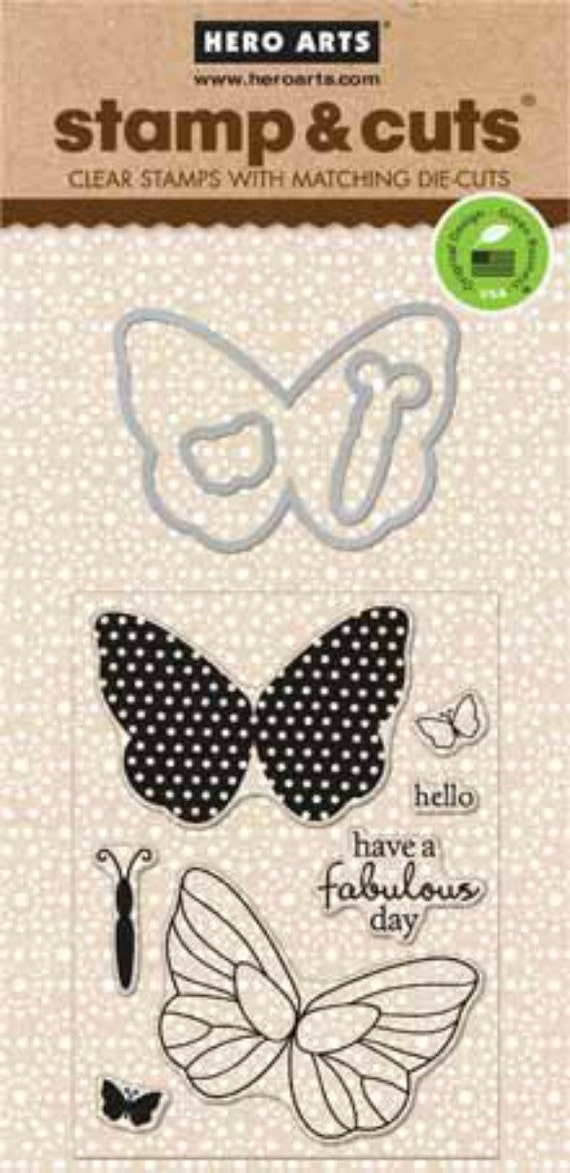
the Stamp and Cut set I used below...
Speaking of shopping...
I finally have my random winner for the
A2Z Scrapbooking $20 gift certificate!!!
Drum roll please...
The first person to comment on my post was chosen by Random.org
Lynn!
Please email me at notjustgreetingshawaii at gmail dot com
for your $25 gift certificate to A2Z Scrapbooking!!
Thanks so much for all those that stop by and comment.
It truly makes my day!
Make sure you stop by on Thursday as I'll be doing another
GIVEAWAY for the Coffee Lover's Blog Hop!
MAHALO!!!
Tuesday, September 8, 2015
Easy Shaker Card for A2Z Scrapbooking
Aloha friends!
I'm "Shaking it Up" over at
A2Z Scrapbooking today
and would LOVE for you to stop by!
I'm using this fun, awesome and easy to use stamp set...
...tips over on A2Z Scrapbooking!
I'd love to hear what you all think.
Don't forget the A2Z Scrapbooking Store has tons of Hero Arts supplies
perfect for all your projects!
Use code Nicki15 for 15% off your entire purchase. You can even make special requests if you don't see something you want!
Mahalo for stopping by!!
Tuesday, September 1, 2015
It's Shaker time over at A2Z Scrapbooking!
Can you believe it's September already?!
We're shaking things up over at
![]() |
| A2Z Scrapbooking |
Our next challenge is to make a shaker card using some Hero Arts products!
Come join the fun for your chance to win a $25 gift certificate to the store.
They specialize in everything Hero Arts, but they also take requests for items that you don't see.
You can even use code Nicki15 for 15% off your entire order!!
Here's my shaker...
I first took Hero Arts Layering paper and die cut out a square
for my shaker window.
I used that sweet pig image from Hero Arts Playful Animals (stamped out twice)
so I could cut out it's head and pop up on foam tape to create a little
head tilt to talk on the phone (from Hero Arts Friends with Lia).
The phone was covered in glossy accents for an old
fashioned look and I hand drew in the coils to connect the phone.
The sentiment was inked up in Hero Arts Ombre Ink Gray to Black on the inside of the card.
I lined the back side of the card front with acetate, filled with Doodlebug Sequins, placed
another layer of acetate and sealed with washi tape.
Then to cover up I added another panel with a die cut square to cover up the washi taped edges.
Here's a closeup...
Come play along with us over at
A2Z Scrapbooking
and show us your shaker project!
Mahalo for stopping by!!
They specialize in everything Hero Arts, but they also take requests for items that you don't see.
You can even use code Nicki15 for 15% off your entire order!!
Here's my shaker...
I first took Hero Arts Layering paper and die cut out a square
for my shaker window.
I used that sweet pig image from Hero Arts Playful Animals (stamped out twice)
so I could cut out it's head and pop up on foam tape to create a little
head tilt to talk on the phone (from Hero Arts Friends with Lia).
The phone was covered in glossy accents for an old
fashioned look and I hand drew in the coils to connect the phone.
The sentiment was inked up in Hero Arts Ombre Ink Gray to Black on the inside of the card.
I lined the back side of the card front with acetate, filled with Doodlebug Sequins, placed
another layer of acetate and sealed with washi tape.
Then to cover up I added another panel with a die cut square to cover up the washi taped edges.
Here's a closeup...
Come play along with us over at
A2Z Scrapbooking
and show us your shaker project!
Mahalo for stopping by!!
Sunday, May 17, 2015
Playing with a NEW tool!
I got this new tool for Mother's Day and could not wait to play!
I've seen a lot of crafters use this tool to create pockets for photos and memorabilia,
but I've also seen it used to make shaker cards!
I LOVE shaker cards, but not fond of the bulk and expense in using a lot of foam tape.
The sewing machine and I don't get along, so stitchwork doesn't work for me.
This tool though...
LOVE!
I took left over plastic packaging
(from the hundreds of stamp packages that seem to accumulate, haha)
I used the We R Memory Keepers nested heart die as a template to run the tool
along the inside of the die to seal the shape.
(don't forget to leave an opening to place sequins and goodies before completely sealing)
In the shaker I used Lawn Fawn's Happy Birthday Border die
and snipped the words apart. I added some Doodlebug Designs
sequins in Bubblegum and die cut some stars from
Lawn Fawn's Stitched Journaling Card.
In the shaker I used Lawn Fawn's Happy Birthday Border die
and snipped the words apart. I added some Doodlebug Designs
sequins in Bubblegum and die cut some stars from
Lawn Fawn's Stitched Journaling Card.
I took the larger heart and die cut the shape.
*TIP: I took tweezers and ran it along the edging between the plastic layers
making sure everything was sealed.
I did have a couple of spots that did not seal well, so I just ran the tool again over those spots.
I actually wanted to just pop this on a card, but the hubby said it looked unfinished.
making sure everything was sealed.
I did have a couple of spots that did not seal well, so I just ran the tool again over those spots.
I actually wanted to just pop this on a card, but the hubby said it looked unfinished.
I wanted to enter this in the next
Simon Says Stamp Wednesday Challenge
so I went with this week's theme colors.
I created a heart window with the smaller heart die
after stamping the background
(with Simons Says Stamp Falling Snow)
in Hero Arts Shadow Inks in Bubble Gum.
Those sweet images along the bottom is
Simon Says Stamp Baby Party Animals that were copic colored
and fussy cut. I added some dots to create grounding for the images.
Ok that's it for me!
Hope you're having a great weekend.
Mahalo for stopping by!!
Simon Says Stamp Wednesday Challenge
so I went with this week's theme colors.
I created a heart window with the smaller heart die
after stamping the background
(with Simons Says Stamp Falling Snow)
in Hero Arts Shadow Inks in Bubble Gum.
Those sweet images along the bottom is
Simon Says Stamp Baby Party Animals that were copic colored
and fussy cut. I added some dots to create grounding for the images.
Ok that's it for me!
Hope you're having a great weekend.
Mahalo for stopping by!!
Sunday, April 26, 2015
Simon Says Stamp Falling Hearts 4 Ways!
Hello there!
This weekend I played with the latest
Simon Says Stamp Falling Hearts background stamp.
Talk about SUPER versatile!!
Let's get to it shall we...
#1. Get your favorite ink color and get inky
(You can get a little fancy too and create an ombre effect like I did below)
I actually used the Hero Arts Ombre ink Pink to Red
I took it a step further and used the
to create a fun frame for a shaker card!
I used Lawn Fawn's Finley's ABCs die to cut cork letters
and used Lawn Fawn's wood veneer for the "O."
I thought it a little plain so I added my own little banner
from the scrap piece of cork I couldn't bare to throw away!
I stamped it in StazOn from Lawn Fawn's Love 'n Breakfast set.
I just loved the little heart dotted "I."
#2. Create a tone on tone look with colored cardstock and similar colored ink.
I used the Hero Arts Lilac Layering Paper
and inked the background stamp with
Hero Arts Shadow inks in Grape Juice and Passion Flower.
I had a request from a friend to make a photo shaker card for his wife.
I used Lawn Fawn's Say Cheese polaroid die and cut it out
5 times on 110lb white cardstock, stacked and glued them together.
The photo was glued to the back of the stacked die cuts.
I then cut one more polaroid and added acetate paper, filled with sequins
and glued to the top.
(if there are requests I could make a video! ;o)
Stamped the sentiment and added Lawn Trimmings to complete the look.
Next up...
#3. White heat emboss and play with watercolors!
After inking up the background stamp with Versamark ink
I sprinkled white embossing powder and heat set.
Then I got out my watercolors!
I'm totally in LOVE with my Gansai Tambi 36 color water set!
It has a beautiful rose gold color that I just swept across the card
from side to side, putting the heaviest of color at the top.
I wanted the bottom of the card to have a similar shimmer
so I dipped the brush in this pearlescent color...
talk about GORGEOUS!!!
(check out stampnhi on Instagram to see it in action)
I kept it simple by die cutting letters from
Lawn Fawn's Cole's ABCs
in DCWV Glitter Matstack (my favorite glitter paper of all time!)
This will be entered in Simon Says Stamp Wednesday challenge too
since it's pretty Clean and Simple.
The sentiment below is from Lawn Fawn's Penelope's Blossoms inked in
Lawn Fawn's Hippo ink.
Finally...thanks for hanging in there...
#4. Create a scene!
Again I white heat embossed, but this time I wanted the concentration of hearts
towards the bottom so I did a little masking and sort of reverse stamped from bottom
of panel to top, leaving a little space for the sentiment.
The sentiment is Hero Arts/Basic Grey Be Silly and added
"MOM" with Hero Arts CL492 Typewriter Letters.
I thought it matched perfectly!
I actually stamped out the flower from
Hero Arts Hello Flowers and masked with
Fineline Masking Fluid before using
distress inks in Spun Sugar, Worn Lipstick and Picked Raspberry.
**Note to self...don't peel the masking fluid right after inking with distress inks
it peeled my paper and I hit myself on the forehead thinking...duh...
let the ink dry first...sheesh!
So to fix it I just restamped the flower using Hero Arts Ombre inks in
Butter to Orange for the flower and Mint to Green for the leaves,
fussy cut and adhered...can't tell right?!
Versatile right?!
There's so many techniques and designs to create with this fun
background. I hope it's inspired you!
Ok...
A few days ago (ok about a week ago...sorry)
I had a giveaway
The lucky commenter of some bloggy goodies...
Shawna Standish!
(please e-mail me your address so I can send the goodies!)
Mahalo for stopping by!!
Sunday, January 11, 2015
Love and Kisses...another shaker card
I've been slowly recovering from the craziness
of the holidays and really trying hard
to get a head start on Valentine cards.
The guys at my work are already making their requests!
Today I'm playing with Avery Elle...
Avery Elle Fill in the Blank, Avery Elle Simply Labels, Avery Elle Needle Little Love
Hero Arts Shadow Inks in Bubble Gum, Passion Flower and Pale Tomato,
Doodlebug Designs Sequins, Simon Says Stamp Stitched Circle Die, Staz On Jet Black
I liked stamping out all those sweet hearts
on the card front
trying to keep it simple from the
pattern paper background.
I got the idea of stamping the sentiment on the acetate from
Jennifer McGuire. I think it gave it a cool effect
that you can hopefully see here...
I'll be entering this in the
inspired by the colors and using the acetate window as
my "chalkboard."
Mahalo for stopping by!
I'll definitely be back to share more shaker cards!!
Wednesday, December 31, 2014
Season's Giving Blog Hop

Welcome to this years
Season's Giving Blog Hop!
(A list of all the blogs to hop on through are at the bottom of my post)
I'm super thrilled to be joining this talented group and be able to share
some of my unloved stash!
(unfortunately mailing only to the US)
I hope you'll be able to make it through my pictorial
and leave some comment love for your chance to
WIN a box full of goodies!!!
Let's get started shall we?
Today's card is a SHAKER...
(unfortunately mailing only to the US)
I hope you'll be able to make it through my pictorial
and leave some comment love for your chance to
WIN a box full of goodies!!!
Let's get started shall we?
Today's card is a SHAKER...
MAHALO for making it through!
I hope you enjoyed that pictorial and if you aren't already following me
I hope you will!!
You can also find me on Instagram (StampnHI), Bloglovin', and Flikr'
so just click on over to those teal colored circles on the top right of my blog.
You'll have til January 5th (my dad's b-day) to comment to win
the loot below...
If you're going in order of the blog hop
Kristi Schurr
is up next.
Happy New Year!!!
Monday, April 21, 2014
Picking Up the Pieces Monday Vol. 21: A Shaker Card
It's Monday and back to the daily grind. Hope you all had a festive Easter weekend! I love family time and my kiddos were wiped out after all the eating and Easter egg hunting.
Today I decided to finally make a shaker card. I have a bunch of sequins that I've been hoarding, and I'm in love with my Doodlebug Designs sequins. They come in these cute little containers and come in varying shades in each color!
Pretty right?!
So here's what I made inspired by the latest Fusion Card Challenge
using the sketch from the challenge
I kinda let the pattern paper do all the talking since I spent waaaay too much time assembling the shaker part...lol. That's it for me! Mahalo for stopping by!!
Today I decided to finally make a shaker card. I have a bunch of sequins that I've been hoarding, and I'm in love with my Doodlebug Designs sequins. They come in these cute little containers and come in varying shades in each color!
Pretty right?!
So here's what I made inspired by the latest Fusion Card Challenge
Lawn Fawn Daphne's Closet and Pink Lemonade pattern paper, Lawn Fawn Blue Skies and dies,
Lawn Trimmings Coral, Doodlebug Designs Sequins, Hero Arts India Ink Black, Sizzix Oval stacking dies
using the sketch from the challenge
I kinda let the pattern paper do all the talking since I spent waaaay too much time assembling the shaker part...lol. That's it for me! Mahalo for stopping by!!
Subscribe to:
Posts (Atom)